Hi there. So I do have plans to make a coat and that will be started shortly. Most of it’s cut out and ready to go. But this has been a really fun and exciting little make for me and my husband. We’ve been putting together some cosplay outfits for each other for a few months now. All ready to wear and bought accessories. But we knew that if he wanted a waistcoat to go with it, I would need to tailor-make it, to fit his size.
I bought some lovely suiting fabric for my Lander trousers last year from Fabworks Mill Shop and so I knew they would have exactly what I wanted. The fabric is Stone Wall Lichen – Harris Herringbone. It’s pricey stuff but so so perfect for what we wanted. I was a little put out that the pattern packet said that I needed 2 metres though. I’ve got easily half a metre left. I hate when they do that, I don’t like being wasteful and overly frivolous like that – it’s a really simple pattern with only about four pieces. Why 2 metres, why?!
So my chap is a generous size and I knew I had to do a fitting adjustment. I found online that I needed to do a Full Abdomen Adjustment. Now this is different to the Full Tummy Adjustment, which is a trouser adjustment which helps cover your tummy from below. This is an adjustment that gives sufficient coverage across a more generous tummy for shirts, jackets and so on, while keeping the sides seams nice and vertical.
So I found that there quite a few sources of how to do the full abdomen adjustment, such as Sleeves and Legs and also Seamwork’s Common pattern adjustments for men. But what I found they DIDN’T tell me, so I kinda figured it out for myself, is how to measure, to know how much you need to adjust by.
I basically cut the pattern piece along the lines they suggest (just below the armscye, across horizontally and then about midway, cut upwards, leaving a tiny bit still attached, so it hinges easily.
Then I got hubby to hold the pattern piece up at his shoulder and I made sure his side seam was straight down his side. Then I made sure that the front was aiming lovely and straight down his front and going across his belly button. He held this in place and the gap created at the bottom that I measured was an inch and a half of movement.
Laying it flat again, I was able to add a piece of scrap paper to bridge that gap. I also straightened out the bottom line. If not adjusted, it would have been a fairly straight diagonal line from front to side. So I hinged the moveable part from where it started life, to where I wanted it to move to. This gave me where I needed the side length to end up, because I still need it to match the height of the back side seam. Hinged it back to my inch and a half movement and the side seam shortened, so I drew back where the old line was in the added piece of paper.
At the top of the armscye, the top of the side seam had moved to up above the armscye curve. So I trimmed this back to the original armscye curve. This worked really nicely.

I did a quick bedsheet toile, and found that if I made sure that his side seams were straight down his side, then the front overlapped absolutely beautifully as it was parallel all the way down.
Oh, by the way, I totally scrapped the idea of the dart they had on the pattern. SO not needed in this case.
Construction was really nice and simple. Good sturdy fabric is a nice change for me and is making me very excited for making my coat. It does what it’s told to do!
So you put the pieces together at the shoulders (darts, pocket welt and back ties all fitted if needed). Then you do the same for the lining pieces. Then you put both together, right sides together, and sew them at the neckline and armscye, leaving the sides open. Then you trim everything (I just used pinking shears instead of overlocking anything as it all gets tucked away behind the lining) and pull it all through the sides to pull it all right sides out.
Press generously with lots of steam on the herringbone side (so you don’t shrivel up the lining) and you’re done for the main construction.


There’s a fun fiddly bit, and I’m actually not being sarcastic, it is quite fun, where you start to sew up the side seams. Basically you pin and sew the outer main fabric pieces together, right sides together, pushing the lining out of the way. Then go over a bit into the lining. Pull it all right again you’re left with the lining partially tucked in and wanting to be sewn up.
Press the lining seam allowance under itself and using slip stitching, hand sew the lining to the main fabric.
I don’t hand sew particularly invisibly, but I’m surprisingly happy with the result.


I’ve added labels and then all I had to do was buttons and the buttonholes. Please don’t mess it up at this point, Nickie. It looks so so beautiful now. And I didn’t.
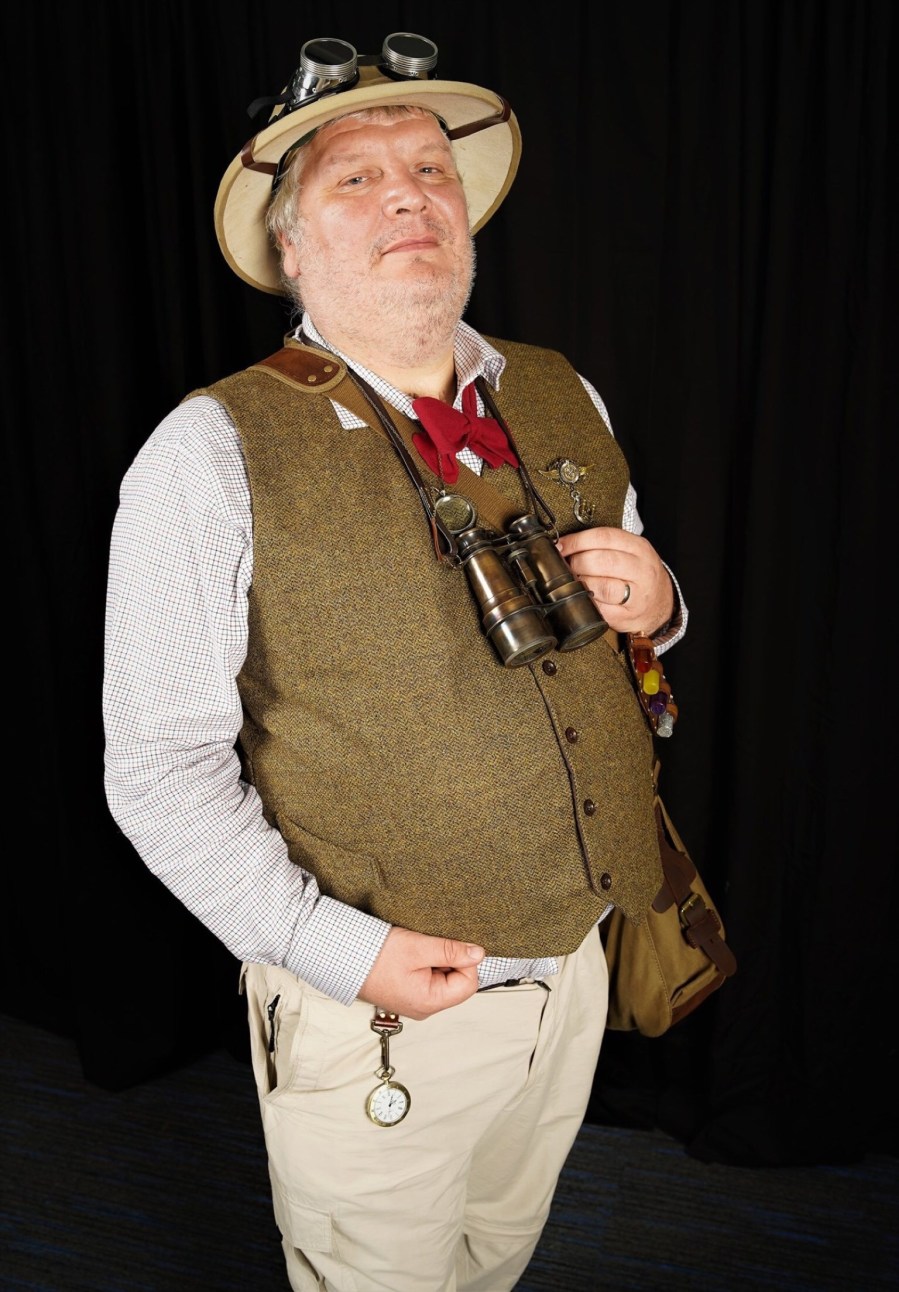
Once it was made and hemmed etc, it was a tad shorter than I would have liked. But for a fun foray into cosplay, and into making for hubby, I was pretty darn pleased with the result. He looked so great. His costume ensemble was part steampunk, part Jack Black from Jumanji.